Tutorial 16: Importing Data
Tutorial 16: Importing Data
Import From ASCII File
Use Intrepid Editor's Import From ASCII File menu to import data from ASCII text files into a new Intrepid database. The import tool supports 3 types of ASCII file formats:
ASEG-GDF2: This is a space delimited ASCII columns file. The data will be in a file with a .dat extension, and this will be accompanied by a text file with a .dfn (or .def) extension which contains the definitions for the ASCII columns in the .dat file. For airborne magnetic and radiometric data the first 4 characters of each row of the .dat file will comprise the characters "DATA".
ASCII Columns: This is also a space-delimited ASCII columns file, but without an accompanying .dfn file. However, the first two rows of the file might contain (a) a comment and/or (b) a row with the field names (space delimited) for the data columns. There can be no spaces in the field names.
Comma Separated Values (CSV) file: This This has the same structure as the ASCII Columns file, but the column headers (if present) and data field are separated by commas rather than spaces.
Importing form an ASEG-GDF2 file
- Launch the Import From ASCII File tool – File|Import From ASCII File. The following window will appear. We are going to work from left to right to: (1) Specify the input and output files; (2) specify column definitions for each column in the file; and (3) import the data.
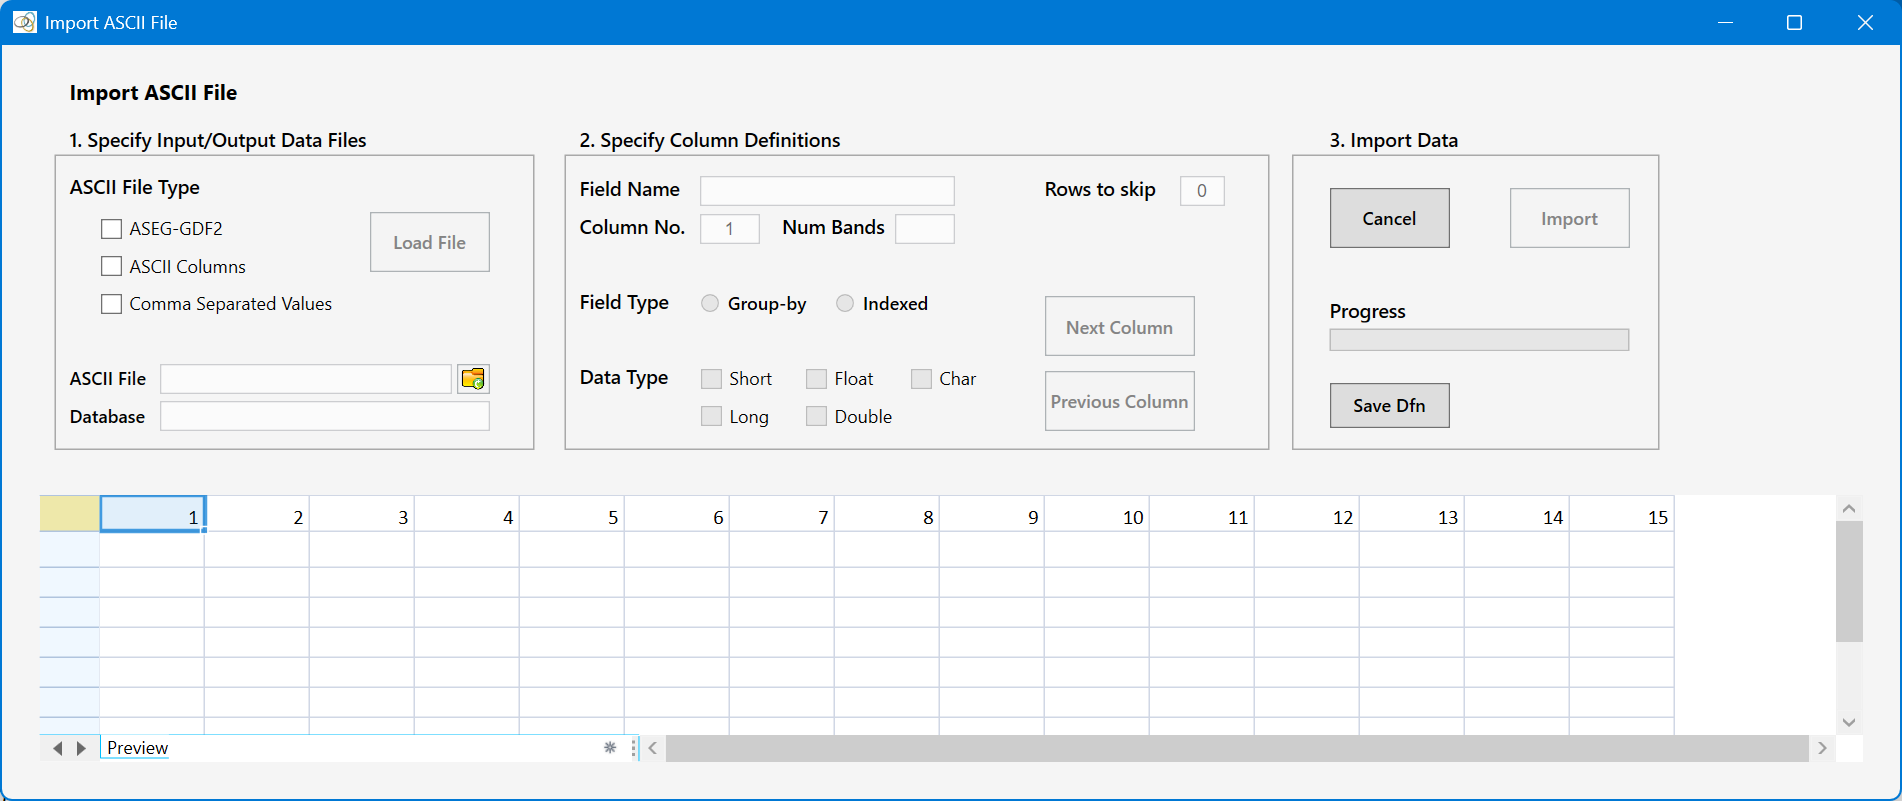
- Select the input file type – select the ASEG-GDF2 checkbox.
- Select the ASCII File – click the folder icon to open a select file dialog for the ASCII File. Navigate to the "demo_data\airborne_spectrometry\import_export" folder. Then select the file geosoft_gdf.dat. There will be a corresponding geosoft_gdf.dfn file in the same directory. These are ASEG-GDF2 export files generated by Geosoft. You can view the files in a text editor to view their contents if you wish.
- Type in a name for a new Intrepid database into the Database textbox – lets call it "INTREPID_GDF". This will be created in the same directory as the ASCII files.
- Click the Load File button. An information window appears - click OK. The the tool window should now look like this:
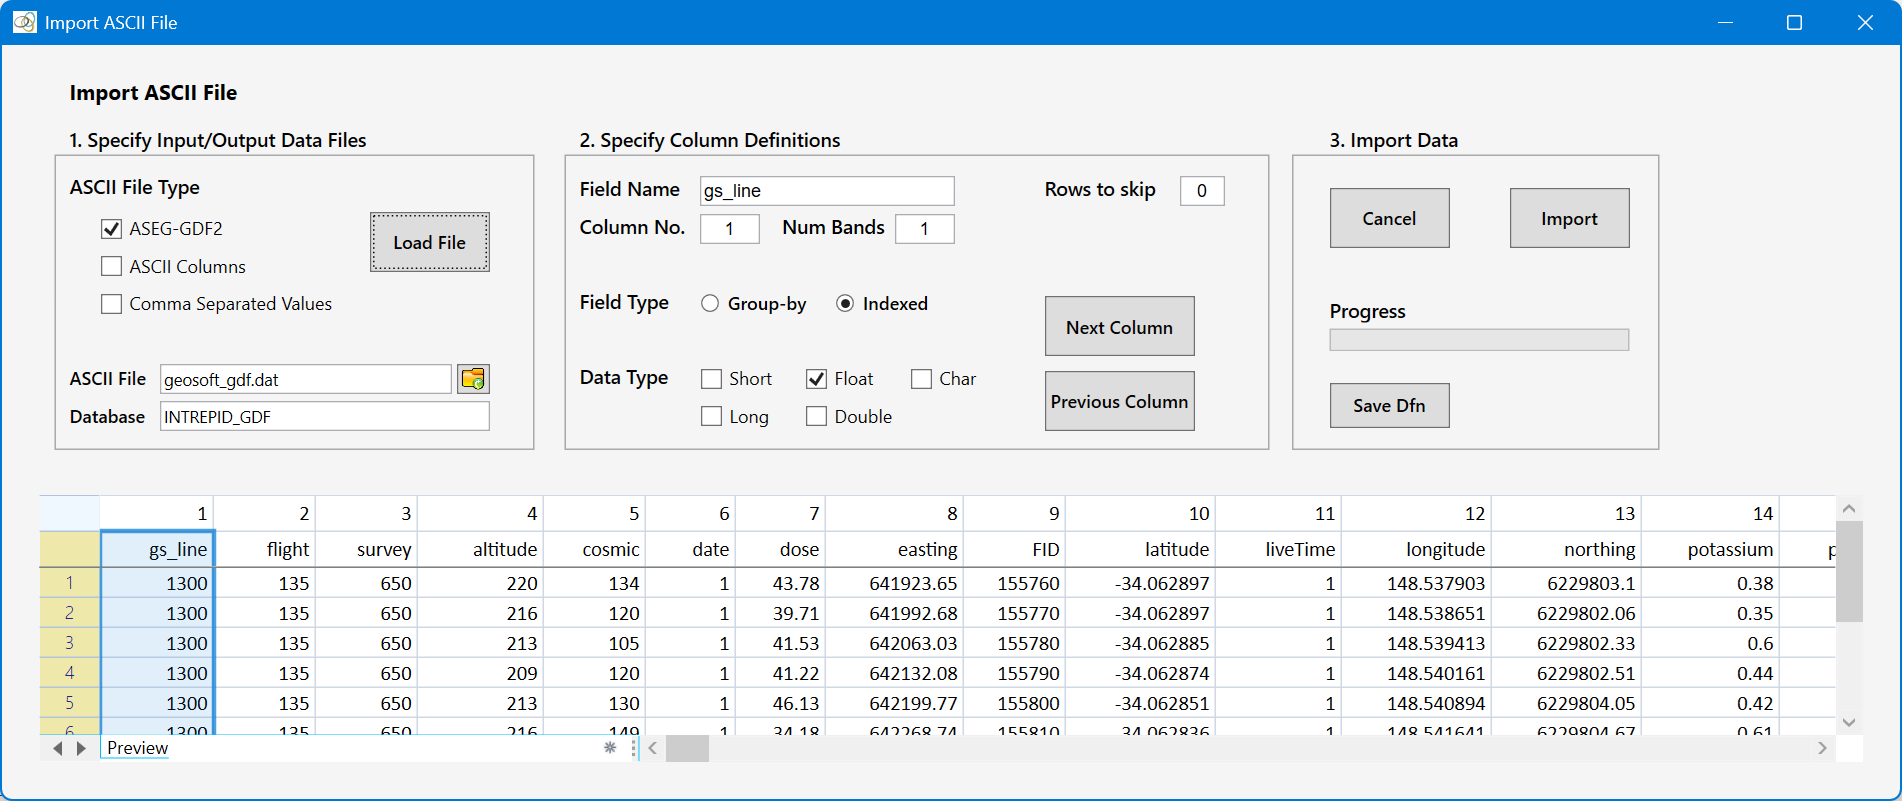
A "preview" of the text file is shown in the mini-spreadsheet - it shows the first 10 rows of the text file. Column headers for each of the columns have been extracted from the .dfn file. We now need to specify how we want each column to be imported
- Specify the Column Definitions – each column can now be selected by clicking in the column or using the Next Column or Previous Column buttons. Change the Field Name if you wish, and specify whether it should be imported as a group-by or indexed field. Specify gs_line, flight, survey, date and LINE (it's in the last column) as group-by fields with data type "Long" (32 bit integers). Specify the eastings, northings, latitude and longitude fields as "Double" (64 bit reals). Leave the rest as the defaults.
Tool Tip: At least one field MUST be specified as a group-by field. This is usually the line number field.
Scroll to the right and click on one of the nasvdAmplitudes_grp columns. You will see 20 columns highlighted. This is a 20-band group-by field (the Num Bands textbox should display "20"). The number of bands for this field was derived from the .dfn file. When you import a multi-band field from a straight ASCII Columns or CSV file, you will have to manually enter the number of bands in this textbox, otherwise, each band will be imported as a separate field. Scroll further to the right and you will find a 256-band spectra field.
- Import the Data – click the Import button.
Open the new database in the editor – File|Load Intrepid Database. Select the INTREPID_GDF..DIR database. Apply the default format to the field display – Format|Apply Default Format. Save these formatting changes to the database – File|Save Database Changes. The next time you open this database in the Editor the formatting will be as it is now. Scroll to the right to see the multi-band fields – they are hidden by default. Click the Show button to display them.
Importing form a Comma Separated Value (CSV) file
- Launch the Import From ASCII File tool – File|Import From ASCII File.
- Select the input file type – select the Comm Separated Values checkbox.
- Select the ASCII file – click the folder icon to open a select file dialog for the ASCII File. Navigate to the "demo_data\airborne_spectrometry\import_export" folder. Then select the file geosoft_csv.csv. This is a Comma Separated Values file generated by Geosoft. You can view the file in a text editor to see its contents if you so wish.
- Type in a name for a new Intrepid database into the Database textbox – lets call it "INTREPID_CSV". This will be created in the same directory as the .csv file.
- Click the Load File button. The the tool window should now look like this:
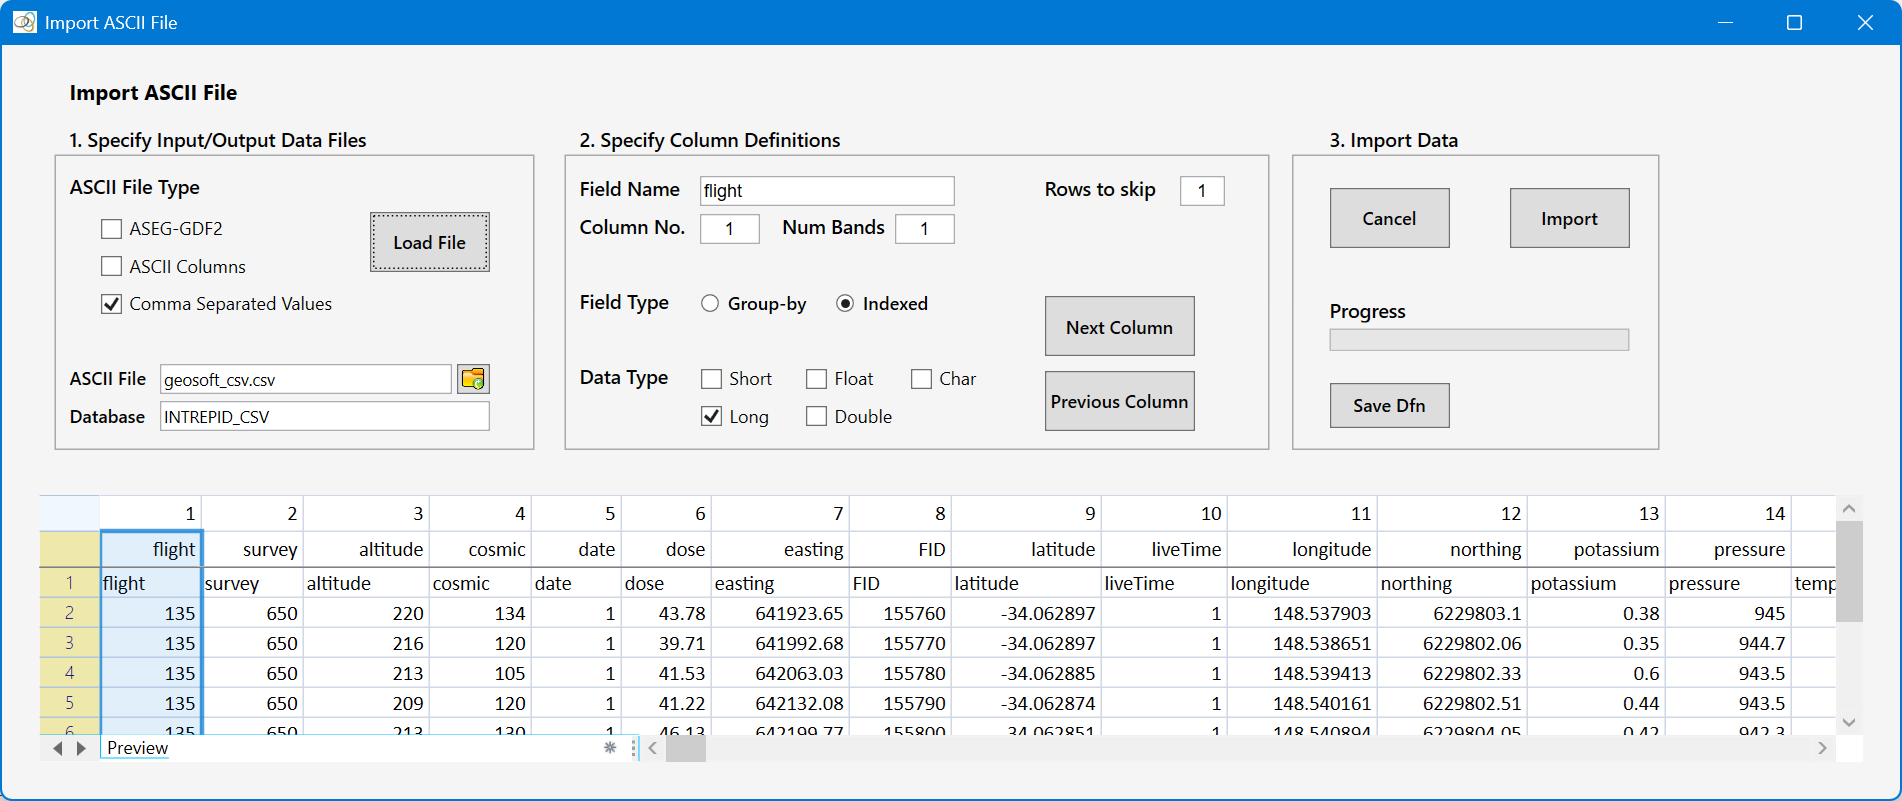
If you view the .csv file in an editor, you will notice that the first line of the file contains the field names separated by commas. The Import ASCII File tool has automatically used these as the field names. In order for this to happen, the number of comma-separated alphanumeric character strings in the header must match the number of comma-separated numerical values in each row of the file. The import tool has also updated the Rows to skip text box to 1. This is the number of rows that must be skipped before the numerical data begins.
- Specify the Column Definitions – each column can now be selected by clicking in the column, or using the Next Column or Previous Column buttons. Change the Field Name if you wish, and specify whether it should be imported as a group-by or indexed field. Specify gs_line, flight, survey, date and LINE (it's in the last column) as group-by fields with data type "Long" (32 bit integers). Specify the eastings, northings, latitude and longitude fields as "Double" (64 bit reals). Leave the rest as the defaults. Scroll right to the nasvdAmplitudes[0] field. Note how each band is a separate field. Click on nasvdAmplitudes[0], and type 20 into the Num Bands text box. Click Next Column. This turns the next 20 columns into a single 20-band field. Do the same for spectra[0] which has 256 bands. Intrepid Editor names multi-band fields using the ":n" extension – for example spectra:1 spectra:2 ..... spectra:256.
- Import the Data – click the Import button.
Open the new database in the editor – File|Load Intrepid Database. Select the INTREPID_CSV..DIR database. Apply the default format to the field display – Format|Apply Default Format. Save these formatting changes to the database – File|Save Database Changes. The next time you open this database in the Editor the formatting will be as it is now. Scroll to the right to see the multi-band fields – they are hidden by default. Click the Show button to display them.